What's inside
As an Amazon Associate I earn from qualifying purchases. This post may contain affiliate links at no extra cost to you.
Fitting timber skirting by hand is mostly a marking, trimming and checking job. The best site kit is not a large box of specialist tools. It is a compact set that lets you measure from fixed points, remove small amounts of wood accurately and hold the work securely while you do it. A sharp chisel and reliable marking knife are usually more useful than a power tool when the final fit is only 1–2 mm out.
As an Amazon Associate we earn from qualifying purchases at no extra cost to you.


Sections
Our Top Picks
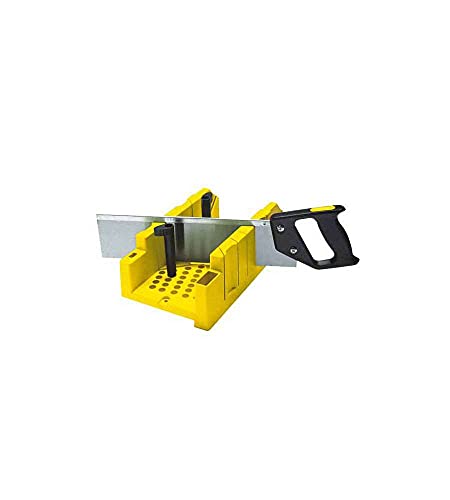 Stanley 1-20-600 Saw Storage Miter Box with SawWith Saw19.29 x 6.85 x 3.98 Inches2.31 poundsCheck on Amazon

What the job really needs
Skirting boards are rarely fitted against perfectly straight walls or floors. You may need to scribe a board to an uneven floor, notch around a door lining, trim an internal corner or shorten a piece without damaging its visible face. The common failure is removing too much material too soon. A hand-fitted joint should be approached in several small cuts, with the board checked in its actual position after each cut.
For a typical room, take a 5 m tape measure, a sharp pencil, a marking knife, a small combination square, a bevel gauge and a straightedge. Add a block plane or low-angle plane, two sharp chisels and a way to support the board. This covers most fitting work without carrying a full joiner’s chest.
The core site kit
| Tool | Useful size or type | Best use | Important trade-off |
|---|---|---|---|
| Tape measure | 5 m, with a readable blade | Room dimensions and board lengths | A wide, rigid blade is easier to read but bulkier on a belt |
| Marking knife | Single-bevel or replaceable-blade type | Clean shoulder lines and accurate scribing | More precise than a pencil, but easier to cut yourself with if stored loose |
| Combination square | 150 mm or 250 mm | Checking square ends and marking short cuts | Small squares travel well; longer ones reference a board more reliably |
| Bevel gauge | Adjustable sliding bevel | Copying odd wall and corner angles | Cheap gauges can move while being transferred |
| Block plane | Low-angle, adjustable-mouth type | Trimming board ends and easing edges | Excellent control, but only if the iron is genuinely sharp |
| Chisels | 12 mm and 25 mm bench chisels | Notches, stopped cuts and corner cleanup | Heavy framing chisels are durable but too clumsy for delicate face work |
| Clamps and supports | Quick clamps plus a sacrificial pad | Holding boards during planing and chiselling | More setup time, but prevents slips and damaged corners |
Measuring and marking without expensive gear
A decent combination square and marking knife will improve fit more than an expensive plane used with poor layout. Use the tape for rough dimensions, then transfer the actual gap with a square, knife or bevel gauge. Do not assume opposite walls are parallel. Measure each board in place, especially around fireplaces, door openings and older plaster.
For internal corners, hold the bevel gauge against the corner and lock it without forcing the stock into the wall. Transfer the angle to the back of the skirting, leaving the waste on the correct side of the line. Mark the face and back clearly. A small arrow showing the direction of the cut prevents the common mistake of reversing an angle.
A pencil is fine for hidden cuts and rough length marks. Use a knife for visible shoulders, small notches and any line that must survive handling. Keep the knife cut shallow—about 0.5 mm is enough. A deep groove can become visible after paint, particularly on soft pine.
Chisels and hand planes
A 12 mm chisel handles narrow notches, hinge-like recesses and corner cleanup. A 25 mm chisel is better for paring wider areas and trimming a broad shoulder. Choose chisels with flat backs that can be polished at the tip. A chisel that is technically sharp but has a rounded or damaged back will not pare cleanly into a marked line.
For skirting, a small set of bench chisels is a better buy than a large mixed set. Keep the bevel facing up for controlled paring, and use a light mallet only when removing waste. Striking a chisel into the finished face can bruise softwood and leave a dent that still shows under paint.
A block plane is the main hand tool for adjusting a straight cut. Set the blade for a shaving roughly 0.1–0.2 mm thick. Start with the plane skewed across the end grain, then take lighter cuts as the fit improves. On end grain, support the far corner or plane toward the centre from both ends. Otherwise the last shaving can break out a triangular chip.
A cheaper block plane is acceptable for occasional DIY work if its sole is flat and its blade can be sharpened. Budget planes often arrive with a blunt iron, a rough sole or a cap iron that does not clamp evenly. If correcting those faults takes an hour before the first cut, a better-finished plane can be cheaper in practice.
Holding the work and carrying the kit
Never try to pare a skirting board while holding it against your knee. Clamp it to a bench, folding work stand or a pair of trestles, using scrap timber or cardboard between the clamp and the painted face. Keep the waste side overhanging the support by 50–100 mm. This gives the chisel room and avoids cutting into the bench.
A modest carpenter tool belt with pouches should carry the tape, pencil, knife, square and a small driver. Do not load it with chisels unless they have secure covers. Loose sharp tools are a fall hazard and quickly damage tape blades. Keep the plane and chisels in a separate tote, ideally with a roll or plastic edge guards.
If you work from a step ladder, reduce the belt load further. Carry only the measuring tools and use a small platform or tool bag for everything else. Reaching sideways while holding a long board is an easy way to lose balance and mark the wall.
A repeatable fitting method
First, offer the board up and mark its length with a short overhang. Cut it slightly long—about 1 mm for a tight visible end, or 2–3 mm where a return or cover strip will hide the joint. Check the board again before trimming. Next, transfer the wall or floor shape using a scribing block, bevel gauge or compass set to the widest gap.
Remove waste in stages. Make a knife line, saw close to—but not through—the waste, then pare or plane to the line. Test the board after every few strokes. If a joint closes at the front but opens at the back, do not keep shortening it; correct the angle. If the end grain splinters, reverse the planing direction or support the edge with scrap.
Useful upgrades and when to skip them
A low-angle block plane is worthwhile if you fit several rooms or regularly work with hardwood skirting. A dedicated marking gauge helps when scribing repeated floor lines, but it is not essential for one room. A longer 600 mm level is useful for checking runs, although it does not replace a straightedge for finding local hollows.
For a single DIY project, spend first on a sound square, a sharp chisel, a controllable plane and secure support. The cheaper option is fine for the tape, pencil and clamps, provided they lock reliably and do not damage the board. Accuracy comes from stable work, clear marks and removing less wood than you think you need.