What's inside
As an Amazon Associate I earn from qualifying purchases. This post may contain affiliate links at no extra cost to you.
Sections
Our Top Picks
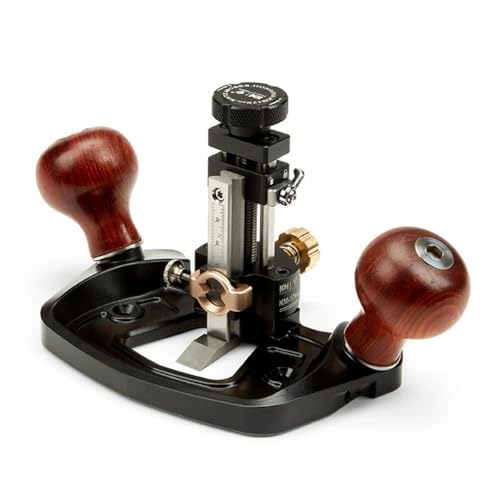 HONGDUI Router Plane Handheld Woodworking Tool Quick Adjust6.8 x 3.3 x 4 inches3.3 poundsCheck on Amazon
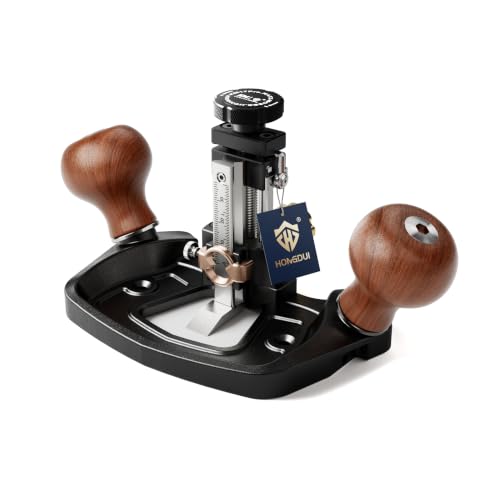


What a router plane does
A router plane trims a recess to a consistent depth. Its broad sole rides on the surrounding surface while a cutter projects through the middle. That makes it useful for bringing a hand-chopped mortise to depth, especially when the bottom is uneven or a shoulder needs to sit flat. It removes thin shavings; it is not a fast way to excavate the whole mortise.
For a typical furniture mortise, chop close to the final depth with a chisel, then use the router plane to level the floor. Check depth with a marking gauge or depth gauge at several points. A difference of roughly 0.2–0.3 mm is often immaterial for a blind mortise, but the shoulder must still bear where the joint design requires it. Do not assume a flat-looking floor is automatically the right depth.
As an Amazon Associate we earn from qualifying purchases at no extra cost to you.


What to buy
For occasional work, a basic, well-made router plane with a rigid body, secure depth adjustment and a cutter that can be sharpened is usually enough. A standard cutter suits most mortise bottoms. A narrow cutter reaches into smaller recesses, but it takes longer to cover an area and is easier to steer off course. If your work includes both narrow mortises and broader housings, check whether additional cutters are available before buying.
Compare the tool’s sole size with the work. A large sole bridges uneven edges steadily, but may not fit between close-set shoulders. A compact tool reaches confined areas but has less support and can rock more easily. For occasional small joints, a cheaper compact plane can be perfectly serviceable if its sole is flat and the cutter holds its setting. Paying more is worthwhile when the adjustment is repeatable, the body stays rigid under pressure, and replacement cutters are available.
Compare hand router planes by sole size, cutter width, adjustment mechanism and replacement-blade availability. Avoid choosing on accessory count alone: a pile of cutters is little help if the blade cannot be set securely.
Compare the options
| Option | Best use | Trade-off |
|---|---|---|
| Full-size router plane | Regular mortises, housings and leveling wider recesses | Stable and quick across a floor, but can be awkward in tight layouts |
| Compact router plane | Small joints and restricted access | Fits where a larger sole cannot, but needs a lighter touch to prevent rocking |
| Chisel and depth gauge | Occasional shallow work or a tight budget | Low cost, but harder to keep a broad floor uniformly level |
A chisel is a reasonable cheaper option when the recess is small and its bottom does not need to be precisely uniform. Pare across the floor with a sharp chisel held flat, checking often. For a wide or deep mortise, the router plane’s reference sole makes the final cleanup more controlled.
Features that matter in use
Look for a sole that sits without rocking and a cutter that locks firmly at a chosen projection. With the cutter retracted, place the tool on a known-flat surface and press alternately on the corners; any perceptible rocking deserves investigation. A badly finished sole can tilt the cutter and produce a floor that slopes even when you guide the tool carefully.
Depth adjustment should be easy to make in small increments and should not creep while cutting. For leveling, start with the blade barely proud of the sole—about 0.1 mm is a sensible first setting. A heavy cut can catch a high spot, lever the tool, or tear fibers rather than shaving them. A sharp edge matters: if the plane skips over the floor or leaves crushed, furry patches, hone the cutter instead of forcing the tool.
Check replacement router-plane cutters if the included cutter is unusually narrow, damaged or difficult to sharpen. Confirm compatibility with the plane rather than assuming cutters are interchangeable.
How to level a mortise
First pare the mortise close to its intended depth, leaving a little material for the router plane. Remove loose chips; one trapped chip under the sole can tilt the tool and spoil the cut. Set the cutter to take a very fine shaving, then test on a high spot. Keep the sole supported on the surrounding reference surface and work across the floor in controlled strokes. Do not press hard on the cutter end: pressure belongs over the sole, where it keeps the plane stable.
Work from different directions if the grain changes, but keep checking that the cutter does not clip a mortise wall or its shoulder. On a small mortise, the sole may bridge the opening in a way that limits access near the edges. Use a sharp chisel for the last narrow strip rather than tilting the router plane into the wall. For a through-mortise, support the work and watch for the cutter breaking through the far face.
Check depth at the ends and center after every few passes. If one area remains low, do not lower the cutter to chase it: that removes material everywhere the sole can reach. Instead, continue shaving the high areas. Stop when the floor is flat enough for the joint and the target depth is reached; extra passes can make a mortise too deep.
Common mistakes and upkeep
The most common failure is taking too much at once. A deep setting can make the plane lurch into a high spot, leaving a gouge that cannot be corrected without lowering the whole mortise. Another is letting the plane rock at an edge; the result is a sloped floor or a rounded shoulder. If the sole cannot remain supported, switch to a chisel for that area.
After use, retract the cutter, wipe the sole dry and protect it from rust. Keep the cutter edge keen and check that its clamp is tight before setting depth. A simple, properly sharpened plane will usually outperform a more elaborate one with a dull blade or loose adjustment. Buy for the size and frequency of your work, not for features you are unlikely to use.