What's inside
As an Amazon Associate I earn from qualifying purchases. This post may contain affiliate links at no extra cost to you.
Sections
Best motorized camera gimbals for heavy DSLRs: the short answer
For most heavy DSLR setups, the DJI RS 4 Pro is the best all-around choice, while the DJI RS 4 is a more sensible buy for a lighter rig and the Zhiyun Crane 4 is worth considering if its handle and included accessories suit your shooting style. Choose by the weight and shape of your fully built camera—not the body alone—and leave room below the published payload for a lens, plate, microphone, and other accessories.
“Heavy” is relative: a DSLR with a compact lens may be manageable on a mid-size gimbal, but a fast zoom, battery grip, and monitor can make the same camera a poor fit. Payload ratings are not a guarantee that every rig below that weight will balance or stabilize well. Arm clearance, plate position, lens diameter, and how far the camera’s center of gravity sits from the axes matter too.
As an Amazon Associate we earn from qualifying purchases at no extra cost to you.

![Zhiyun Weebill S [Official] 3-Axis Gimbal Stabilizer for Mirrorless and DSLR Cameras](https://m.media-amazon.com/images/I/41dofxRBqiL._SL160_.jpg)
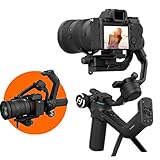
Shortlist by shooting situation
- Heavier DSLR, frequent professional use: DJI RS 4 Pro. Its 4.5 kg (10 lb) rated payload gives more headroom for larger camera-and-lens combinations than the standard RS 4.
- Moderately heavy DSLR, regular shoots: DJI RS 4. It has a 3 kg (6.6 lb) rated payload and is a more compact option when the complete rig fits comfortably within that limit.
- Run-and-gun shooting with a preference for an adjustable handle: Zhiyun Crane 4. Its 6 kg (13.2 lb) stated payload is substantial, but check the particular camera’s physical clearance and balance range before buying.
- Infrequent shoots on a tight budget: Consider a previous-generation full-size gimbal from a reputable manufacturer, if available new or with a dependable warranty. Avoid buying solely on a high payload number; confirm compatibility with your exact rig and accessories.
Key specifications at a glance
| Gimbal | Published payload | Approx. gimbal weight | Published battery runtime | Best fit |
|---|---|---|---|---|
| DJI RS 4 | 3 kg (6.6 lb) | About 1.24 kg (2.73 lb), before accessories | Up to 12 hours | DSLR rigs that are heavy but still relatively compact |
| DJI RS 4 Pro | 4.5 kg (10 lb) | About 1.24 kg (2.73 lb), before accessories | Up to 13 hours | Larger lenses, heavier bodies, and more demanding builds |
| Zhiyun Crane 4 | 6 kg (13.2 lb) | About 1.67 kg (3.68 lb), before accessories | Up to 12 hours | High-capacity rigs where its dimensions and balance geometry work |
These are manufacturers’ headline specifications, not guaranteed operating results. Runtime is generally quoted under favorable conditions; screen use, wireless connections, motor load, temperature, and battery age can reduce it. Verify current regional specifications and included batteries before purchase, since kits and accessories vary.
What matters more than the payload number
Balance range and clearance
A gimbal must balance on all three axes with the camera powered off. A long lens can push the camera too far forward, while a deep camera body or battery grip may collide with an arm during a tilt. A rig can fall below the payload limit and still be unusable if the plate cannot slide far enough or an axis runs out of adjustment. Look for a model-specific compatibility list, then check the camera, lens, grip, and plate as one assembly.
Leave practical headroom rather than aiming to run at the maximum. As a conservative buying check, weigh the complete rig and aim for no more than roughly 80% of the stated payload. For a 3 kg-rated gimbal, that means a working build around 2.4 kg or less. This is not a manufacturer rule, and it does not replace a balance check; it is a useful buffer for accessories and less-than-ideal weight distribution.
Stabilization modes and controls
All three options provide follow-style modes that let the camera pan or tilt as you move, as well as modes intended to hold a direction steady. These are useful for different moves, not interchangeable quality settings: follow modes suit walking turns and tracking, while a locked direction can help with a straight push or carefully framed move. DJI’s newer RS series also offers a portrait-orientation option for vertical shooting. On any model, learn how to switch modes without changing your grip or looking away from the subject.
Electronic stabilization in the camera can interact with gimbal movement, particularly during pans. Test the camera’s stabilization settings with the gimbal and lens combination, and check footage for warping or an overly stiff horizon before an important shoot.
Mounting and camera control
Check for a secure, compatible quick-release plate and enough space to reach the camera’s ports, battery door, and card slot. A plate that allows a fast tripod transfer can save time, but it does not eliminate the need to rebalance after changing lenses or adding accessories. Accessory mounting points are useful for a fill light, monitor, or transmitter, but every addition increases payload and shifts the center of gravity.
Camera-control cables and wireless controls can enable functions such as recording or focus adjustments, but compatibility depends on the camera model and connection. Confirm the manufacturer’s supported-camera list rather than assuming a port or cable will work with every DSLR.
Comfort over a long shoot
Gimbal weight is only part of the fatigue equation. The combined camera, lens, gimbal, handle, and accessories can become tiring even when the setup is technically within limits. A larger-capacity Crane 4, for example, weighs more than the listed DJI RS models before a camera is added. Conversely, choosing a lighter gimbal with too little payload headroom can leave motors working harder and make the setup less forgiving.
For long takes, use a sling, support handle, or vest system that is explicitly compatible with the gimbal and suitable for the rig’s weight. Take breaks, keep elbows close to the body, and avoid holding the camera far in front of you. A heavier lens mounted forward increases leverage and can make the rig feel tiring sooner than its total weight suggests.
Setup checks that prevent bad footage
- Build the camera as it will be used. Fit the lens, plate, grip, filter, microphone, and any cable that will remain attached. A cable pulling against an axis can spoil a balanced setup.
- Balance each axis with the gimbal off. Adjust tilt, roll, and pan in the order described in the manual. The camera should stay where you leave it instead of swinging toward one side.
- Run the manufacturer’s motor calibration. Use the recommended auto-tune or motor-strength procedure after balancing. Excessive motor force can cause vibration and waste battery; too little can let the camera sag.
- Walk and pan-test before filming. Check for arm collisions, horizon drift, cable snags, and lens clearance through the full movement range. Repeat the check after changing a lens or accessory.
- Plan for real battery use. Treat quoted maximum runtime as an upper bound. Carry a charged spare or charging plan for a full day, and confirm whether charging while operating is supported for your model and battery.
Buying decision by budget and frequency
| Situation | Practical choice | Why |
|---|---|---|
| Occasional shoots; compact DSLR rig | DJI RS 4, if the complete setup balances with headroom | Avoid paying for capacity you will not use, but check lens clearance first. |
| Frequent work; larger lens or added accessories | DJI RS 4 Pro | More payload capacity provides breathing room for a heavier build. |
| Very heavy build or preference for Crane 4’s handling | Zhiyun Crane 4, after a compatibility check | Its higher published payload is appealing, but balance geometry and carrying weight still decide the fit. |
| Low-cost, occasional use | Previous-generation full-size model with a reliable warranty | Can reduce upfront cost, but inspect battery condition, parts availability, and camera compatibility. |
Full-size DSLR gimbals commonly range from a few hundred dollars for older or entry-level models to around $1,000 or more for premium kits and accessories; prices vary by region and bundle. Include batteries, support gear, and any required camera-control accessories in the budget.
Ownership details people overlook
Gimbals have few routine consumables, but batteries lose capacity over time, and the quick-release clamp, adjustment knobs, and locking mechanisms take wear from repeated setup. Keep the axes locked for transport, avoid carrying the camera by an unlocked arm, and use a padded case to protect the motors and screen. Wipe dust and grit from the plate and clamp before tightening; debris can prevent a secure fit. After transport or a hard bump, rebalance and recalibrate rather than compensating with stronger motor settings.
The best motorized camera gimbal for a heavy DSLR is the one that can balance your complete rig, clear it through the moves you need, and remain comfortable enough to use for the length of your shoot. For most buyers, start with the RS 4 if the build is modest, step up to the RS 4 Pro for more headroom, and consider the Crane 4 when its capacity and handling fit your exact camera setup.