What's inside
As an Amazon Associate I earn from qualifying purchases. This post may contain affiliate links at no extra cost to you.
If you cut more than two tenons at a time, a standard marking gauge will cost you accuracy. A thumb-screw that slips 0.2mm between the third and fourth mortise cheek means a tenon that rattles or needs paring. Micro-adjust marking gauges solve that by adding a fine-thread screw that lets you creep up on the line in 0.05mm increments and then lock without moving. For repeated tenon layout, that is the difference between batching out eight identical joints and tuning each one by hand.
As an Amazon Associate we earn from qualifying purchases at no extra cost to you.


Sections
Our Top Picks
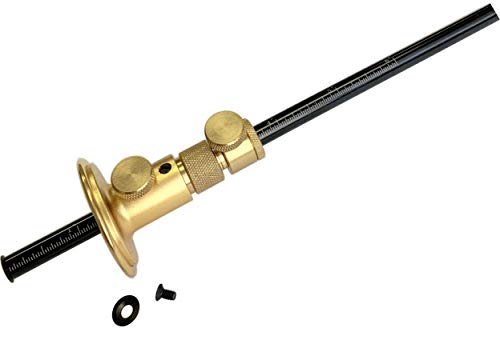

Why micro-adjust matters for tenons
A tenon has at least four lines that must match: two cheek lines and two shoulder lines, mirrored on both faces. If you are working from a reference face and edge, you typically set one gauge to the cheek thickness, often 1/3 of stock, and a second to the shoulder length. On 3/4″ (19mm) stock, a 1/4″ (6.35mm) cheek means any error over 0.15mm shows as a step in the shoulder or a gap in the mortise wall.
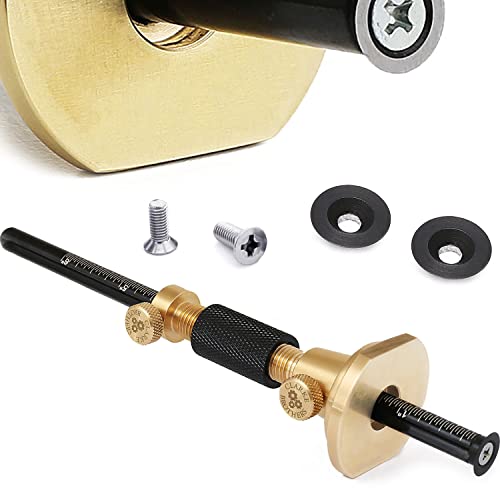
Standard beam gauges rely on friction and a single thumbscrew. You tap the beam, tighten, check with calipers, tap again. It works for one-off layout, but the beam shifts as you tighten. A micro-adjust gauge separates coarse and fine movement. You slide the head close, lock the coarse stop, then turn a knurled wheel or thumbscrew with 0.5mm or 0.75mm pitch to dial in the final setting. When you lock the cutter, the setting does not move. You can return to the same dimension after marking other parts, which is essential when you mark all cheeks, then reset for shoulders without losing your first setting.
The other advantage is pressure control. Wheel and disc cutters on micro-adjust gauges cut a clean, shallow knife line with light pressure, so the line does not wander in reversing grain. Pin gauges tear, especially in oak or ash, and that torn line makes a chisel or saw drift.
What to look for in a tenon gauge
Adjustment mechanism: Look for a captive fine-thread screw with a knurled collar, not a loose threaded rod. Good ones give 6-8mm of fine travel. More than 10mm is unnecessary and adds slop. The screw should turn smoothly loaded against the beam without backlash. If you can wiggle the head 0.1mm back and forth with the micro-adjust engaged, the threads are too loose.
Locking: There are two locks that matter – the coarse beam lock and the micro-adjust lock. Brass thumbscrews with a flat on the beam are more reliable than plastic levers. The worst failure mode is a single lock that holds both. When you tighten it, the head rotates slightly and the cutter moves 0.1-0.3mm. Two independent locks prevent that.
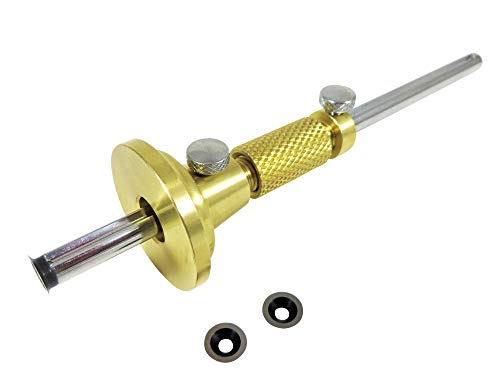
Cutter type: For tenons you want a wheel or disc cutter, ideally hardened steel at 58-60 HRC, about 10-12mm diameter. A round wheel follows a straightedge or the stock face without digging. Single-bevel wheels cut to one side, which helps when you want the waste side to be clean. Dual-rod mortise gauges with two wheels are useful for marking both cheeks at once, but only if both wheels have independent micro-adjust. Fixed-distance mortise gauges assume your mortise chisel matches the gauge, which it rarely does exactly.
Reference face: The stock or fence that rides against the wood should be at least 35-40mm long and 20mm tall, with a flat, square face. Small round fences rock on narrow edges. Look for stainless or anodized aluminum faces with a slight relief in the middle so it registers on its edges, not on sawdust in the center.
Scale: An engraved metric/imperial scale on the beam helps you get close quickly, but do not trust it for final setting. Always set against calipers or a setup block. Scales stamped at 1mm increments are fine; scales that claim 0.5mm accuracy from the factory are usually optimistic.
Wheel, cutting, and mortise gauges compared
For repeated tenons most shops end up with two gauges: one single-wheel micro-adjust wheel marking gauge for shoulders and single cheeks, and one dual-wheel gauge for paired cheeks. Here is how the main types compare:
| Type | Micro-Adjust Range | Lock Stability | Line Quality | Best For |
|---|---|---|---|---|
| Single Wheel, Micro-Adjust | 6-8mm | Excellent – two locks | Clean knife line, minimal tear | Shoulder lines, single cheek, dovetail depth |
| Dual-Wheel Mortise Gauge, Micro-Adjust | 3-6mm per wheel | Good if independent locks, poor if shared | Two parallel lines in one pass | Batch tenon cheeks, mortise walls |
| Cutting Gauge (spear cutter) | None or 5mm | Moderate | Deep cut, good for cross-grain shoulders | Shoulder only, not ideal for long-grain cheeks |
| Traditional Pin Gauge | None | Poor – slips under pressure | Tears long grain | Rough work, softwoods only |
For tenons, avoid pin gauges entirely. A cutting gauge with a spear cutter is excellent for scoring a shoulder across end grain because it severs fibers aggressively, but it tends to follow grain on long-grain cheek lines. A wheel is more forgiving there.
Practical picks by use case
You do not need the most expensive gauge to get repeatability, but cheap wheel gauges with plastic micro-adjust collars are a false economy. The threads strip, and the plastic compresses so the lock never holds.
For a single-gauge setup on a budget, a well-made single-wheel gauge with a brass micro-adjust collar in the $35-$55 range will handle both cheeks and shoulders if you are willing to reset between operations. Set the cheek, mark all pieces, then reset for the shoulder. It adds 2-3 minutes per batch of eight tenons but keeps tolerances within 0.1mm if you use calipers to verify.
If you cut tenons weekly, add a dedicated dual-wheel mortise marking gauge with micro-adjust. Set the two wheels to your mortise chisel width – for example, 6mm wheels set to 8.0mm apart for a 5/16″ mortise – and leave it. Use your single-wheel gauge for shoulders only. This two-gauge system eliminates resets and is how most furniture shops avoid mixed-up settings. Expect $70-$110 for a solid steel or stainless dual-wheel gauge with independent fine adjustment per arm.
At the top end, gauges with stainless beams, hardened wheels, and 0.02mm feel, such as the machined Tite-Mark style or Veritas wheel gauges, cost $120-$180 but hold up for years. The difference is not accuracy on day one – a $45 gauge can be just as accurate – but wear. Brass wear strips and hardened beams do not develop grooves after 500 meters of marking, and the micro-adjust screw does not develop play.
Setting up for repeatable tenon layout
Micro-adjust is only useful if your setup is consistent. Work from one reference face and one reference edge for every piece. Mill your stock to uniform thickness first; a 0.3mm variance in thickness will make a perfect gauge setting look wrong.
To set the gauge, clamp a digital caliper at the target dimension, say 6.35mm for a 1/4″ cheek. Slide the wheel against one jaw and the fence against the other, lock coarse, then use micro-adjust until the wheel just kisses the jaw without forcing it. Mark a test piece and measure the line to shoulder with calipers, not a rule. Adjust 1/8 turn at a time – on a 0.5mm pitch screw, 1/8 turn is about 0.06mm.
Mark with light pressure, two passes. First pass scores the fibers, second pass deepens. Heavy pressure bends the beam and compresses the fence against the wood, which can add 0.2mm error on softwoods like pine. Keep the fence fully registered, with even finger pressure near the cutter, not at the end of the beam.
For batch work, mark all cheeks on one face, flip the batch, then mark the opposite cheeks without touching the gauge. If your gauge has a round fence, add a strip of 220-grit self-adhesive sandpaper to the fence face to prevent creep on waxy woods. Clean the wheel with a drop of oil on a rag; resin buildup makes the wheel skid instead of cut, which creates a double line.
When the cheaper option is fine and when it is not
If you cut four tenons a year for a workbench or a door, you can get by with one decent single-wheel gauge and calipers. You do not need a matched pair. Spend the money you save on a good 150mm digital caliper and a flat diamond plate to keep the wheel sharp.
Do not go cheaper on the dual-wheel mortise gauge. Low-cost versions with a single central screw to set wheel distance slip under marking pressure, and the two lines converge by 0.2-0.4mm over a 100mm run. That error forces you to pare tenon cheeks, which defeats the purpose. If you cannot afford a good dual-wheel gauge, use your single-wheel gauge twice with a setup block. It is slower but more accurate than a sloppy mortise gauge.
Also avoid gauges with plastic beams for tenon work. They flex 0.1-0.2mm when you press, and temperature changes shift them. A stainless or brass beam holds dimension in a cold shop.
For site kit or tool belt carry, a compact small wheel marking gauge with micro-adjust is worth the weight. The fence takes abuse in a bag, so pick one with a captive wheel that does not protrude beyond the fence when retracted.