What's inside
As an Amazon Associate I earn from qualifying purchases. This post may contain affiliate links at no extra cost to you.
Sections
Our Top Picks
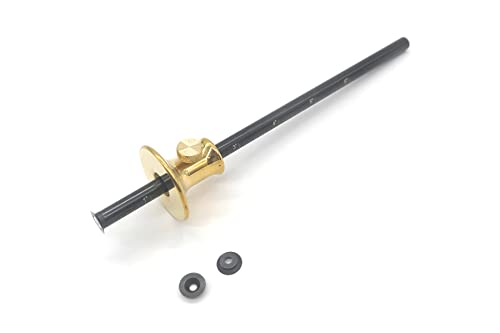
 Woodpeckers Wheel Marking Gauge With Micro Adjust1 Count (Pack of 1)8 x 4.5 x 2.3 inchesCheck on Amazon


Why Hardwood Punishes Cheap Gauges
On softwood or plywood, almost any marking gauge will leave a visible line. On hardwood — hard maple, white oak, walnut, hickory — the same gauge will skate, tear, or wander off the grain. The density and alternating grain direction fight the cutter instead of guiding it.
A pin-type gauge is the worst offender here. The needle point acts like a plow. In hardwoods with open grain like oak and ash, it follows the earlywood and jumps 0.5mm or more off your line. In very hard closed-grain woods like maple, you have to press so hard to get a visible mark that you compress the fence and lose your setting. If you only build with pine and poplar, a $12 pin gauge is fine. For hardwood joinery where 1/64″ (0.4mm) matters, it is not.
As an Amazon Associate we earn from qualifying purchases at no extra cost to you.


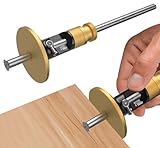

For hardwood, you want a gauge that cuts the fibers rather than scratching them. That means a knife or wheel cutter, a fence that locks dead square and does not shift under pressure, and a stem that will not flex over 4 to 6 inches of reach.
The 4 Types That Matter
Pin gauge: Traditional beech or rosewood stem with a hardened steel pin. Cheap, simple, easy to sharpen with a file. Cuts with a scratch. On hardwood it tears across the grain and drifts with the grain. Good for rough layout and for beginners who want to learn technique without spending much.
Cutting gauge (Japanese style): Uses a small spear-point knife or skewed blade instead of a pin. The blade severs fibers cleanly and leaves a crisp line that also acts as a knife wall for chisels and saws. Holds up well in hardwoods and across end grain. Requires more skill to set the blade projection — 0.3mm to 0.5mm beyond the stem is plenty — and to keep it sharp.
Wheel gauge: A hardened steel disc with a beveled edge, mounted to roll and slice. This is the modern standard for hardwood cabinet work. The wheel leaves a fine, consistent line with very light pressure, works with or against the grain, and is forgiving for one-handed use. Micro-adjust models let you dial in a setting by 0.1mm. The downside is that cheap wheels are often dull or loosely mounted, which creates a wobbly double line.
Mortise and panel gauges: Variations for specific jobs. A mortise gauge has two pins/wheels to scribe both walls of a mortise at once. A panel gauge has a long 12″ to 18″ beam for scribing lines far from the edge, for example for ripping a board to width or marking out dovetail baselines on wide panels. If you cut a lot of mortise-and-tenon joints in hardwood, a dedicated double-cutter gauge saves time and error.
What Actually Matters on Hardwood
Cutter geometry: Look for a wheel or knife that is flat on one side and beveled on the other. Set it with the flat facing the waste side so the cut registers tightly to your final dimension. A double-beveled pin has no reference face and will always have some slop.
Fence stability: The fence is more important than the cutter. On hardwood you push harder, and any play is magnified. Brass or steel fences with a broad 45mm to 60mm face resist tipping better than narrow rosewood fences. The lock matters most. A single brass thumbscrew that bears directly on the stem will eventually dent the stem and slip. A collet lock or a screw with a brass shoe that clamps the stem evenly holds within 0.05mm even after repeated bumps. If the fence rocks when you wiggle it with your thumb, it will rock on the wood.
Stem rigidity: 16mm to 19mm diameter stems in stainless steel or hard-anodized aluminum do not flex. Cheap 12mm brass or wooden stems will bow 0.2mm to 0.4mm if you scribe a 6-inch line with moderate pressure, which is enough to ruin a tight shoulder. For most cabinet parts you need 6″ (150mm) of capacity; for larger casework, 8″ is better.
Adjustment: Fine adjustment is not a gimmick on hardwood. If your gauge jumps from 19.8mm to 20.4mm when you tighten it, you will chase the setting forever. A knurled micro-adjust wheel or threaded collar that moves the fence 0.5mm per rotation lets you hit a dimension and hold it. It also prevents the classic failure where you overtighten to compensate and shift the setting.
Ergonomics: You should be able to set, lock, and scribe one-handed while the other hand holds the board. Gauges with large, knurled locks and a fence that sits comfortably between thumb and forefinger are faster and safer. Small wing nuts and narrow fences cause fatigue and uneven pressure.
Comparison: Which Gauge for Which Hardwood Task
| Type | Best For | Line Quality on Hardwood | Ease of Use | Typical Price |
|---|---|---|---|---|
| Pin Gauge | Softwood layout, learning, rough carpentry | Poor – tears and follows grain | Very easy | $10 – $25 |
| Cutting / Knife Gauge | Dovetails, tenon shoulders, across end grain | Excellent – clean knife wall | Moderate, needs sharpening | $25 – $70 |
| Wheel Gauge | General hardwood marking, parallel scribes | Excellent – fine, consistent cut | Easy, one-handed | $20 – $85 |
| Wheel Mortise Gauge | Paired lines for mortise/tenon | Excellent if both wheels are sharp | Moderate, needs careful setup | $35 – $120 |
| Panel Gauge | Long parallel lines 12″+ from edge | Good, depends on cutter fitted | Two-handed, bench required | $40 – $150 |
What to Buy Based on How You Work
If you do general hardwood furniture and want one gauge to start, get a wheel marking gauge with a stainless steel stem and a brass or steel fence at least 50mm wide. The sweet spot is $30 to $55. Below $20 you get soft wheels that dull quickly and plastic locks that creep. Above $70 you are paying for micro-adjust and fit-and-finish that help but are not essential unless you do daily joinery.
If you cut a lot of hand-cut joinery, pair that wheel gauge with a cutting marking gauge with a spear-point blade. The knife leaves a deeper wall than a wheel, which is useful when you want to register a chisel or saw directly in the line for tenon shoulders and dovetail baselines on hard maple or white oak. Keep a fine diamond file or 1000-grit stone nearby; a sharp cutter wants honing every few weeks of regular use.
If you cut mortises often, a dedicated mortise marking gauge with two independently adjustable wheels is worth it. Setting two single gauges to the mortise chisel width takes time and doubles your error. A proper mortise gauge lets you set the mortise width once with the chisel itself as a gauge, then scribe both walls in one pass. Avoid cheap mortise gauges with two pins — they make two torn lines and make chisel registration harder.
You do not need a panel gauge unless you regularly scribe lines more than 6 inches from an edge. A wheel gauge with a 6″ capacity handles 90% of hardwood cabinet work. If you break down wide hardwood panels by hand, an 18″ beam panel gauge is faster and more accurate than measuring and connecting marks with a straightedge.
When the cheap option is fine: If you only need to mark rough parallel lines for ripping on the table saw and do not care about tearout, a basic pin gauge or even a combination square will do. Save your money. If you are marking finished joinery in hardwood that will be visible, the upgrade to a wheel or cutting gauge pays for itself in fewer miscuts.
How to Scribe Cleanly in Hardwood
Technique matters as much as the tool. Set the gauge with a rule or calipers, then make a light first pass to establish the line. On hardwoods, two light passes beat one heavy pass. Tilt the gauge 15 to 20 degrees in the direction of travel so the cutter slices rather than plows, and pull it toward you with the fence held firmly against the edge. Keep the fence flat — if you lift the heel, the cutter goes shallow; if you roll the fence, the line drifts.
On oak and ash, scribe from the face side and the edge side where the joint will show. The wheel will cut cleaner when the bevel faces the keeper side. If the line looks ragged, stop and hone the cutter. A dull wheel on hard maple will burnish instead of cut and requires so much pressure that you lose control.
Common failure modes to watch for: the fence slowly moving mid-line (tighten the shoe, check for sawdust on the stem), the wheel loosening and leaving a double track (tighten the axle screw, add a drop of threadlocker if it repeats), and the stem denting under the lock screw (rotate the stem 90 degrees to find an undented spot, then upgrade to a shoe-type lock next time).
Store the gauge with the cutter retracted or guarded. A single drop on concrete will flat-spot a wheel, and the line will never be fine again.