What's inside
As an Amazon Associate I earn from qualifying purchases. This post may contain affiliate links at no extra cost to you.
Fitting a sticking sash is usually a job for a sharp plane, a pencil and a little patience—not an excuse to remove wood everywhere the paint has rubbed. First find the tight spots, then take off thin shavings and test the fit often. For most repairs, a low-angle block plane or a standard bench plane is a better buy than a specialist sash plane.
As an Amazon Associate we earn from qualifying purchases at no extra cost to you.



Sections
Our Top Picks
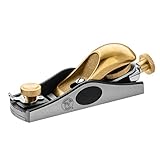
 Rockler Bench Dog No. 60-1/2 Low Angle Block60-1/2 Block Plane6.25 x 1.6 x 6.25 inches0 PoundsCheck on Amazon
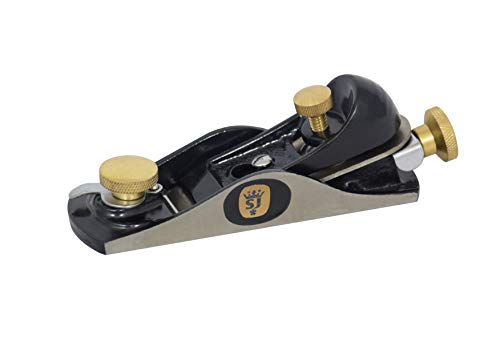 Spear & Jackson CBP95 9 1/2 Carpenters Block9 1/2 In6.89 x 1.77 x 2.76 Inches1.98 poundsCheck on Amazon


Which plane suits the job?
A block plane is compact and easy to control on a sash edge, especially when the repair is limited to a few tight spots. A standard No. 4-size bench plane gives better support on a long, straight stile and is more comfortable for removing material over several inches. A shoulder plane can pare a rebate shoulder, but it is a specialist tool: most homeowners do not need one just to ease a sash in its opening.
| Plane type | Best use | Trade-off |
|---|---|---|
| Block plane | Small adjustments, end grain and short edges | Quick to handle, but its short sole can follow dips in an uneven edge |
| No. 4 bench plane | Long, straight sash stiles and controlled material removal | More stable on long edges, but larger and heavier |
| Shoulder plane | Trimming a rebate shoulder or tenon-like detail | Precise for its task, but unnecessary for ordinary edge fitting |
If you are buying one plane for occasional sash work, compare a low-angle block plane with a No. 4 bench plane. A low-cost plane can be entirely adequate if its sole is flat, the blade holds an edge and the adjuster works without excessive play. A premium plane does not compensate for a dull iron or poor technique.
Find the actual tight spot first
Remove the sash if that is practical and check that it is sound. Look for swollen paint, loose joints, cracked glass, damaged cords or weights, and a frame that has shifted. A sash that sticks because of a broken balance or a distorted frame will not be fixed by planing the sash smaller. On an older painted window, take lead-paint precautions before scraping or sanding; do not create dust casually.
Mark the edge with chalk or a soft pencil, then move the sash carefully in the frame. The marks that rub off or burnish reveal contact points. Check the sides, meeting rails and bottom edge separately. Also inspect the clearance at the top and sides: the goal is an even working gap, not a loose sash that rattles or admits drafts. The correct clearance depends on the window and its condition; do not assume that removing a fixed amount, such as 1/8 inch from every side, is appropriate.
Set up the plane and the work
Support the sash securely on padded trestles or a bench. Do not clamp across glass or bear down on fragile joints. If the sash must stay in place, protect the glass and surrounding trim, and plane only where you have safe access. Mark the high spots clearly. A small square helps check whether an edge is square to the face, while a straightedge can reveal a bow that a short block plane might follow rather than correct.
Inspect the blade and set it for a fine cut. It should be sharp enough to slice cleanly without forcing the plane. Set the mouth and depth conservatively, then take a test shaving on scrap. On painted or previously repaired wood, a deep cut can tear out fibers, catch at a joint or lift a thin layer of paint and filler. If the edge is rough, start with very light passes rather than trying to remove the whole high spot at once.
Plane in short, controlled stages
Work only on the marked tight areas at first. Keep the plane flat at the start and end of each stroke to avoid rounding the corners. If the edge is long and straight, a bench plane bridges minor hollows better than a block plane. For a short contact point, the block plane is easier to place precisely. Plane with the grain where possible; reversing direction can cause tear-out, particularly near joints or on figured wood.
After a few passes, brush away shavings and test the sash again. Repeat the marking process instead of guessing where it still binds. Stop as soon as it moves freely through its travel. Check that the sash still closes against the stops and that the meeting rails align. Removing too much can leave a visible daylight gap, reduce weather sealing and make the sash rattle; replacing that wood neatly is harder than taking one more shaving.
When another tool is the better choice
A sharp chisel can clean a small, local obstruction in a rebate, but it is easy to dig a hollow or cut through a thin edge. Use it with the bevel controlled and take small bites. For a broad, uneven edge, a plane is generally easier to keep flat. A file or abrasive paper may be useful for a tiny final adjustment, but sanding is slow for meaningful material removal and can round over the edge.
Before paying extra for a plane, check that the sole is flat enough for the work, the blade can be adjusted laterally, and replacement irons are available. A used plane can be good value if the body is not cracked and the iron has enough life left; rust, a loose knob or a badly dulled blade is manageable, but a warped sole or damaged adjuster can turn a bargain into a project. For a first plane, a basic adjustable block plane is often the cheaper, sensible choice for occasional small corrections. Choose a bench plane instead if you expect to true longer edges or use it on other carpentry work.
Finish by sealing any freshly exposed exterior wood with a suitable primer or finish before reinstalling the sash. Keep finish off sliding contact surfaces where buildup could make the window stick again. Refit the sash, check its full travel, then make only a final light adjustment if a specific spot still rubs.