What's inside
As an Amazon Associate I earn from qualifying purchases. This post may contain affiliate links at no extra cost to you.
A first chisel set should survive ordinary site work, sharpen without a fight, and cover the joints an apprentice is likely to cut. It does not need to be a luxury presentation box. A sensible starter set has six to eight bench chisels, durable handles, a flat back, and steel that can be maintained with basic sharpening gear.
As an Amazon Associate we earn from qualifying purchases at no extra cost to you.


Sections
Our Top Picks


What an Apprentice Actually Needs
For general carpentry, a useful range is roughly 6 mm, 10 mm, 12 mm, 18 mm, 25 mm, and 32 mm. In imperial sizes, that is close to 1/4, 3/8, 1/2, 3/4, 1, and 1 1/4 inches. The 6 mm and 10 mm chisels handle hinges, strike plates, and small housings. The 18 mm and 25 mm sizes do most general joinery. A 32 mm chisel is useful for cleaning broad mortises and trimming shoulders.
A set with only four chisels can work if its sizes are well chosen. A 6, 12, 20, and 25 mm selection is more useful than a poorly made 12-piece set with duplicated sizes. Extra-wide chisels are helpful for paring and trimming, but they are not essential on a first purchase.
Look for chisels sold as bench chisels rather than delicate paring chisels. Bench chisels can be pushed by hand and tapped with a mallet. A plastic or metal striking cap is useful, but it should not encourage you to hammer every task. Heavy blows can mushroom a tang, split a handle, or bend a thin blade.
The Best Set Types for Beginners
| Set type | Best use | Advantages | Limitations |
|---|---|---|---|
| Basic bench set | General carpentry and site work | Good size coverage, affordable, easy to replace | Usually needs initial sharpening |
| Premium bench set | Frequent joinery and cabinet-quality work | Better finish, flatter backs, more consistent edges | Costs more and still needs maintenance |
| Heavy-duty framing set | Rough mortises, notching, and demolition-adjacent work | Thicker blades and tougher handles | Less precise for fine paring and trimming |
| Paring chisel set | Fine fitting and end-grain trimming | Long blades give excellent control | Not intended for hammering |
For most apprentices, a basic or mid-range bench chisel set is the right starting point. The cheaper option is fine when the chisels will mainly be used on softwood framing, door hardware, and rough site joinery. Spend more when you expect regular hardwood work, accurate mortises, or long daily use.
Steel, Edge Retention, and Sharpening
Chisel steel is only part of the result. A well-ground inexpensive chisel can outperform an expensive one with a hollow or damaged back. Check that the back is reasonably flat near the cutting edge. It does not need to be polished across its entire length, but the first 20 to 30 mm behind the edge should sit flat on a sharpening stone.
Most apprentice sets use carbon or chrome-vanadium steel. Both can work well. Harder steel may hold an edge longer in abrasive hardwood, but it can take more time to sharpen and may chip if struck carelessly. Softer steel sharpens quickly but needs more frequent honing. For site work, easy maintenance is often more valuable than maximum edge retention.
Plan on a sharpening setup rather than assuming the set is ready for work. A 1,000-grit stone establishes an edge, while a 4,000- to 8,000-grit stone refines it. A basic honing guide can help a beginner hold a consistent 25- to 30-degree bevel. Keep a small secondary bevel of about 1 to 2 degrees; it reduces the amount of steel removed during later honing.
New chisels commonly arrive with a blunt edge, a burr, or a back that needs flattening. Allow 20 to 40 minutes for initial preparation per chisel if the finish is poor. That is normal, not evidence that the tool is defective.
Handles and Durability
Polypropylene or other impact-resistant handles are usually the safest choice for an apprentice’s first set. They tolerate a mallet, survive a damp tool bag, and are less likely to split when dropped. Wooden handles feel better in the hand and are easy to replace, but inexpensive wood can crack around the ferrule or swell after repeated wetting.
Choose a handle that gives a secure grip without being so bulky that it interferes with controlled paring. A striking end should be clearly designed for impact. Do not use the cutting edge as a pry bar, screwdriver, paint scraper, or nail punch. Those shortcuts roll the edge and can chip the corner in seconds.
Protect the edges in a tool bag. A simple roll, plastic guard, or short length of hose prevents one chisel from damaging another and reduces the chance of cutting your hand while searching for a tool.
Recommended Buying Options
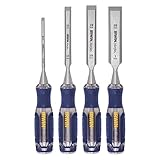
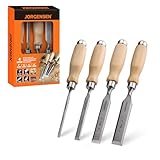
If the budget is tight, buy a six-piece six-piece wood bench chisel set and spend the remaining money on stones, a honing guide, and a mallet. This is the better value for an apprentice who is still learning sharpening. A set costing twice as much will not stay sharp if it is thrown loose into a toolbox or used against screws and nails.
Choose a premium set when the blades arrive flat and consistently ground, the handles are comfortable for several hours of use, and replacement chisels are available individually. Buying individual sizes later is cheaper than replacing an entire set after one heavily used 25 mm chisel is damaged.
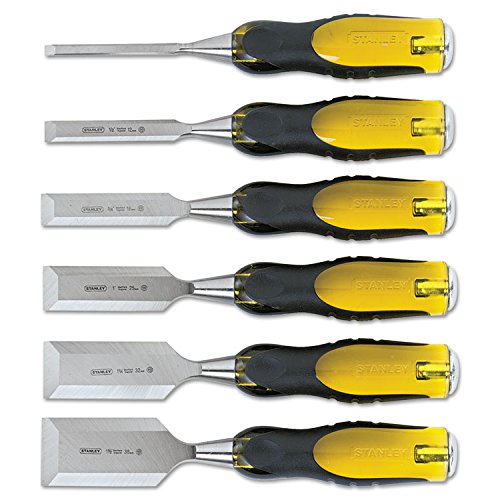
A dedicated heavy-duty wood chisel set makes sense for framing and renovation work where chisels are used to clean notches, remove waste, and deal with rough timber. It is a poor substitute for fine bench chisels when fitting hinges or trimming a visible joint.
How to Use Them Without Ruining Them
Remove most waste with a drill, router, saw, or repeated shallow cuts before using the chisel to clean the surface. Work with the bevel down when you need a predictable flat cut, and use the bevel up when paring allows more control of the cutting angle. Take cuts of 1 to 3 mm rather than trying to remove the full depth at once.
Inspect the edge whenever resistance suddenly increases. A rolled edge, bright chipped corner, or deep nick means it is time to sharpen. Stop before forcing the tool: excessive leverage is how handles split and joints become oversized. Wipe the blades after wet or treated timber, add a thin coat of rust preventative, and store the set dry.
The best apprentice set is the one that covers common sizes, can take a clean edge, and is cheap enough that you will use it without fear. Buy fewer good-working chisels, learn to sharpen them, and add specialist sizes only after your actual jobs show that you need them.