What's inside
As an Amazon Associate I earn from qualifying purchases. This post may contain affiliate links at no extra cost to you.
Sections
Our Top Picks
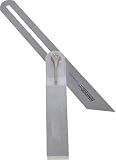
 Johnson Level & Tool 1913-1000 Professional Aluminum T-Bevel10 Inch0.75 x 3.75 x 13.13 inches0.02 poundsCheck on Amazon


What a Sliding Bevel Can—and Cannot—Do
A sliding bevel, also called a bevel gauge, transfers an angle from one surface to another. It is useful for carrying a roof pitch, stair angle or wall corner onto trim, but it does not measure the angle in degrees. For compound cuts, that distinction matters: the tool helps you capture the geometry, while the saw’s bevel and miter settings make the cut.
For a crown or other trim that sits at an angle to the wall and ceiling, first establish how the trim will sit. A bevel gauge can transfer the wall-to-ceiling angle, but it cannot by itself tell you the correct saw settings. Test the layout and cut on offcuts of the same profile before cutting finished stock. A small error at the corner can leave a visible gap along the whole joint.
As an Amazon Associate we earn from qualifying purchases at no extra cost to you.



What to Look for When Buying
Check the locking action first. The blade should move smoothly when released and stay put when tightened. A weak lock can shift while you mark or transfer an angle, turning a useful setup into a bad cut. Tighten the lock firmly, then press the blade lightly; it should not creep.
Blade length is a practical choice, not a precision rating. A blade around 200–250 mm (8–10 inches) suits many trim and site-layout jobs. A longer blade reaches across wider work, but can be awkward in a tool belt or tight corner. A shorter blade is easier to carry but may not span the surfaces you need to copy.
Look for a blade that sits flat against the stock and a handle that is comfortable to hold against a corner. Metal construction usually tolerates site use better than a light plastic body, though build quality and lock design matter more than material alone. A clearly marked angle scale can help with repeat settings, but it is not a substitute for checking the angle against the work.
For a simple, occasional job, a basic sliding bevel gauge is often enough. Spend more if you use one regularly, need a stronger lock, or want a more substantial handle for accurate transfers.
Sliding Bevel Options Compared
| Type | Best for | Trade-off |
|---|---|---|
| Basic metal bevel gauge | Occasional trim, stairs and general angle transfer | May have a small or less positive locking knob |
| Heavier-duty bevel gauge | Frequent site work and larger pieces of stock | Costs more and can be bulky to carry |
| Bevel gauge with angle scale | Jobs where you need to repeat or note an approximate setting | Scale reading can be less reliable than direct transfer |
| Digital angle finder | Reading and repeating angles in degrees | Needs batteries and still has to sit squarely on the surfaces |
A conventional bevel gauge is a good choice when you can reach both surfaces and transfer the angle directly. If you need to record an angle, set a saw by degrees, or compare several corners, a digital angle finder can be quicker. It does not eliminate setup errors: dirt, rounded edges and a device held out of square can still produce a misleading reading.
Setting Out Compound Trim Cuts
Start with sound reference surfaces. Remove dust, check that the trim is not twisted, and place the bevel gauge firmly against the surfaces whose angle you need. Loosen the lock, swing the blade until it touches the second surface, then tighten the lock without letting the blade move. Check the fit again before lifting the gauge away.
Transfer the angle to a square-edged scrap or a piece of the trim, keeping the gauge handle flush against the reference edge. Mark with a sharp pencil or knife. A broad pencil line can hide a small error; a fine mark makes it easier to line up the saw cut. If the work has an irregular surface, take more than one reading and check whether the corner changes along its length.
For compound trim, keep the trim in the same orientation during measuring, marking and test cutting. Mark the wall side, ceiling side and the face that will be visible. Reversing the stock or turning it over can make a correct angle appear wrong. With crown molding, a spring-angle jig or consistent nesting position can help hold the profile at the same angle on the saw each time.
Set the saw from the layout method you are using, then cut a short offcut. Hold the two test pieces in place and inspect the joint at both edges. A gap on one edge often points to an incorrect bevel or miter setting; a gap that varies along the length may indicate a bowed wall, twisted stock or poor support. Change one setting at a time and make another test cut, rather than guessing at several adjustments at once.
Common Mistakes and Care
The common failure is trusting a transferred angle that was not locked securely. Another is measuring at one height and cutting trim that meets a different angle elsewhere. On uneven walls, a single reading may not describe the whole corner. Take readings near the top and bottom of the run, and decide whether to fit the trim to the worst gap or scribe it to the surface.
Do not force the blade against a rounded or damaged corner and assume it has found the true angle. Use a straightedge to extend the surfaces if needed. Keep the blade clean, check the pivot for play, and avoid overtightening a small locking knob; excessive force can damage threads or make the tool difficult to adjust.
A sliding bevel is a modest purchase, but it pays to test the lock before taking it to the job. For occasional work, a basic gauge and careful test cuts are usually sufficient. For repeated compound trim work, prioritize a secure lock and a blade long enough to bridge the surfaces, then let accurate layout and offcut tests—not the price tag—decide whether the setup is right.