What's inside
As an Amazon Associate I earn from qualifying purchases. This post may contain affiliate links at no extra cost to you.
Trimming a hardwood door lining is controlled removal, not demolition. You may be shaving a hinge recess, easing a tight door stop, cleaning a lock-side rebate, or making a small correction after the lining has been fitted. The best chisel is sharp, stiff enough to hold a straight edge, and comfortable to control when working across end grain. A complete set is not essential: two or three sensible sizes will cover most door work.
As an Amazon Associate we earn from qualifying purchases at no extra cost to you.

Sections
Our Top Picks


What to look for in a door-trimming chisel
For general lining work, start with a bevel-edge bench chisel around 12 mm (1/2 inch) wide and another around 25 mm (1 inch). The narrow chisel gets into hinge corners and lock rebates; the wider one removes waste cleanly and helps produce a flat shoulder.
Choose a chisel with a reasonably thick blade and a handle designed for light striking. A thin paring chisel is excellent for shaving a hinge leaf recess, but it can bend or suffer handle damage if you hit it with a mallet. Conversely, a heavy framing or mortising chisel will take hard blows but feels clumsy for fine fitting.
Hardwood is less forgiving than softwood. A mediocre edge may last through a pine lining but roll over quickly in oak, beech, or dense engineered hardwood. Look for a blade that can be sharpened easily and retains a clean bevel. Stainless steel is not automatically better; many good woodworking chisels use high-carbon or alloy tool steel instead.
The most useful chisel types
| Chisel type | Best use | Main advantage | Limitation |
|---|---|---|---|
| Bevel-edge bench chisel | General trimming, hinge recesses, rebates | Versatile and easy to control | Not intended for heavy levering |
| Paring chisel | Final shavings and fine fitting | Excellent control and clean cuts | Usually must be pushed, not struck |
| Mortise chisel | Deep square cuts and stubborn waste | Strong blade and handle | Too bulky for delicate hinge work |
| Framing chisel | Rough chopping and site joinery | Tolerates force and occasional abuse | Leaves less refined cuts and is heavier |
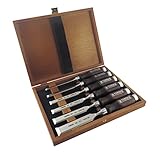
A standard bevel-edge bench chisel set is the best starting point for most carpenters. If you fit doors regularly, add a good 6 mm (1/4 inch) chisel for tight hinge corners and a 32 mm (1 1/4 inch) chisel for broad, shallow paring.
A practical setup for hardwood linings
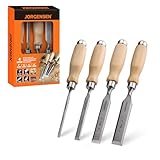
For one-off work, a 12 mm and 25 mm bench chisel are enough. For regular installation work, use four sizes: approximately 6, 12, 19, and 25 mm. Imperial sizes are common, so a set containing 1/4, 1/2, 3/4, and 1 inch is equally practical.
Add one long paring chisel if you frequently need to ease a door or refine a long hinge recess. Its extra length gives better hand clearance and makes it easier to keep the back flat against the work. A long paring chisel is not a substitute for a striking chisel, though. Hitting a delicate handle can split it or loosen the blade socket.
For heavy chopping, a 19 or 25 mm mortise chisel is useful, particularly when cleaning deep lock recesses. It is a specialist purchase rather than a first choice for trimming linings. Most hinge recesses are only a few millimetres deep, and a heavy mortise chisel can remove material too aggressively.
Sharpness matters more than price
A sharp chisel should cut end grain without excessive force and should pare a thin shaving from the face of the lining. If you need to lean your full weight on it, stop and sharpen it. A blunt edge tends to crush hardwood fibres, skid out of the recess, and damage the visible arris.
A basic sharpening arrangement is a coarse or medium diamond plate, a fine stone, and a honing guide if you are not confident holding the angle. A primary bevel around 25 degrees with a small secondary bevel around 30 degrees is a useful general setup. Do not chase a mirror finish before the edge is straight and keen; a consistent working edge is more valuable on site.
Keep the back flat for the first 25 to 40 mm behind the cutting edge. The back is your reference surface when paring against a hinge leaf or lining face. Rounding it over makes accurate trimming much harder.
How to trim without damaging the lining
Mark the waste with a sharp pencil or knife, then score the finished edges across the grain. Make a shallow knife line at both ends of a hinge recess or rebate. This prevents the fibres from running beyond the mark, a common failure in oak and other straight-grained hardwoods.
Remove most waste with the chisel bevel facing down or up according to the cut and the control required. For a hinge recess, start with light vertical cuts inside the waste area, spaced about 3 to 5 mm apart. Do not begin directly on the finished boundary. Break out the ridges, then pare back to the knife line in shallow passes.
When working near an exposed edge, cut toward the waste whenever possible. A chisel that exits into the finished face can lift a splinter or blow out the corner. If the grain direction changes, reverse the cutting direction rather than forcing the blade through resistant fibres.
A small woodworking carpenter’s mallet is preferable to a metal hammer for normal chopping. Use light taps and let the sharp edge do the work. A 450 to 600 gram mallet is ample for hinge and lining adjustments; heavier blows increase the chance of overshooting the mark.
Where to spend and where to save
The cheaper option is fine if you are fitting a single softwood or moderately hard lining and are prepared to sharpen the chisels before use. Budget sets often arrive with uneven backs or thick factory edges, but these faults can be corrected if the steel is sound. Expect to spend 20 to 40 minutes preparing a basic set.
For repeated hardwood work, pay more for better edge retention, a comfortable handle, and a blade that arrives close to flat. You do not need the most expensive professional set. A reliable mid-priced set plus a separate narrow chisel is often better value than a large twelve-piece kit containing sizes you will rarely use.
Protect the cutting edges in your tool bag. Do not leave chisels loose beside screws, drill bits, or a metal tape measure. A simple chisel roll or tool pouch prevents chipped edges and keeps the sizes easy to find. Wipe hardwood dust and moisture from the blades after use, and touch up the edge before the next door rather than waiting until the chisel is completely blunt.