What's inside
As an Amazon Associate I earn from qualifying purchases. This post may contain affiliate links at no extra cost to you.
The short answer: the best carpenter pencils are flat, rectangular pencils with a sturdy core that leaves a clear, visible line on rough lumber, does not snap when you press, and does not roll off a sloped roof or a sawhorse. A medium-grade lead suits most framing and general work. Choose softer when you need a bold line on rough or damp wood, and harder when you need a thin line on smooth stock. A refillable mechanical or clutch-style holder is worth considering for fine layout, and a knife or a dedicated sharpener will keep any style working properly.
This guide does not rank brands. It explains why the flat shape exists, how lead hardness changes what you see on the wood, when other marking tools beat a pencil, how to sharpen without wasting the pencil and how to avoid the habits that cause crooked cuts. Prices, styles and packaging vary, so check the latest listing details and any manufacturer instructions before you order.
Sections
Our Top Picks



Contents
- Why carpenters use a flat pencil
- Lead hardness and color
- Styles: classic, mechanical, clutch and specialty
- Sharpening methods
- Marking accurately
- When a pencil is not the right tool
- Comparison table
- Carrying and storing pencils
- Buyer checklist
- Mistakes to avoid
- FAQ
- Bottom line
Why carpenters use a flat pencil
Walk a framing site and you will see the same pencil in pockets and behind ears: wide, flat and rectangular. The shape is practical rather than traditional for its own sake. A round pencil rolls away the moment you set it on a slope, while a flat one stays put on a rafter, a sheet of plywood or a sawhorse. The wide body also makes it easy to hold with gloves on, and the thick core gives you room to sharpen to a chisel edge that lays down a wide or narrow line depending on how you turn it.
That chisel point is the real trick. Hold the pencil with the flat face against a square and the edge draws a fine line. Turn it a quarter turn and the broad side makes a heavy mark you can see from across a room. A round pencil with a conical tip has only one line weight until you sharpen it again.
Thick core and durability
Carpentry pencils have a wider core than a school pencil so they survive pressure on rough lumber. A thin round lead that works fine on notebook paper will snap against a splintery two-by-four. The extra width also resists breaking when the pencil falls in a pocket or bounces off a deck.
Visibility on rough and dirty stock
Sawn lumber, pressure-treated boards and sheathing can be damp, dusty or dark. A softer core leaves a bolder mark in those conditions. On sanded stock or hardwood, the same soft pencil leaves a smudgy, broad line that leads to sloppy cuts, so match the lead to the surface.
Lead hardness and color
Pencil cores are made from a graphite and clay mix; more clay makes a harder, lighter line and more graphite makes a softer, darker one. Manufacturers describe hardness on scales that differ slightly, so look for words like soft, medium or hard in the listing, and read the manufacturer’s description of the core instead of trusting the color of the body.
Soft lead
Soft leads mark easily with little pressure and show up well on rough or wet surfaces. The downsides are quick wear, a wider line and smearing. They are great for rough framing layout, cut lines on sheathing and quick notes.
Medium lead
Medium cores hit the middle ground for general carpentry. They are bold enough for dimensional lumber and hold a point long enough for trim and subfloor layout. If you only buy one type, this is typically the safe choice.
Hard lead
Harder cores leave thin, crisp lines that suit finish carpentry, cabinet layout and smooth stock. They need more pressure and may be hard to see on rough surfaces. They are also less likely to smear on your hands and shirt.
Colored and specialty cores
Some pencils use colored cores, such as bright red or yellow, for marking on dark wood, treated lumber or metal. Others are made for wet surfaces or for greasy materials. These can be handy for specific jobs, but check what the manufacturer says about the surfaces and removal, since certain waxy or pigment-based marks do not sand off easily and may show through paint or stain.
Styles: classic, mechanical, clutch and specialty
Classic flat wooden pencil
This is the default. It is cheap, light and easy to replace. You sharpen it with a knife, a rasp, sandpaper or a purpose-made sharpener. The main drawback is that you must keep it sharp and will lose length every time. For most framers and remodelers, the economics are hard to beat.
Mechanical carpenter pencils
These hold a thick, rectangular or round lead in a refillable body, so you never need to sharpen. They are neat in a shirt pocket and often have a built-in sharpener for the lead. Plastic bodies are light but can crack, and metal bodies add durability. Check which lead size and shape the holder accepts, because refills are usually specific to a body. A mechanical option suits people who dislike carrying a knife or who do a lot of fine layout.
Clutch and lead-holder styles
A clutch or lead holder grips a thick core that you extend by pressing a button. You sharpen the core with a small pointer. They offer the line quality of a long-pointed pencil and the refillability of a mechanical one. They are popular among people who draw plans as well as mark lumber.
Grip and body
Look at the finish of the pencil body. A rough lacquer or ridged texture helps in sweaty or gloved hands, while a slick coat can slip. Some sets also include a clip or a hole for a tether, which can reduce the number of lost pencils.
If you want to compare options, you can browse flat carpenter pencils and mechanical carpenter pencils and check each listing’s core description before you order.
Sharpening methods
The pencil is only as useful as its point. A flat pencil that is not sharpened right can feel clumsy and leave fat lines.
With a knife
A sharp utility or pocket knife shaves the wood and exposes a long chisel edge. Cut away from your body and your hand, put the pencil on a stable surface when possible, and keep the blade clear of your fingers. A knife is also a risk on a moving site, so be deliberate. If you carry a retractable blade, close it when you are done and keep it away from loose pockets.
With sandpaper or a rasp
A strip of sandpaper or a small rasp can shape the chisel edge without a blade. It is slower, but it is safer for beginners and works well for refining a line. Keep the abrasive in a pouch so it does not tear pockets.
With a dedicated sharpener
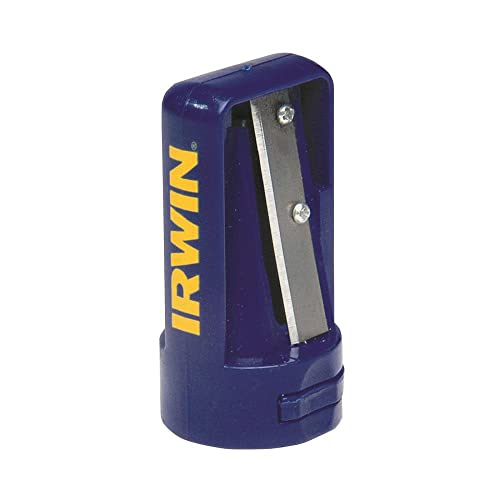
Sharpeners made for flat carpenter pencils have a wide opening and typically create a chisel or conical point. They save time and keep the shavings in a small chamber. They also dull and need replacement blades, so check how easily the blade can be swapped.
Choosing a point shape
A long chisel edge makes a fine line for layout. A short, wide chisel edge is stronger for rough marks. A conical point can be nice for writing notes on drywall and plywood but gives up the line-width trick. Practice rotating the pencil to alternate line thickness while you work.
Marking accurately
A pencil only helps if the line is precise. The best measure-and-mark technique minimizes the width of the line and removes guesswork about which side to cut.
- Use a small tick, not a long line. Make a short mark at the measurement and then draw a square line through it.
- Mark an X on the waste side. This stops you cutting on the wrong side of the line.
- Hold the chisel edge against the square. Keep the flat face tight to the tool to avoid drift.
- Decide where the line goes. Cutting on the line, to the line or leaving the line are different choices, so know which one your job needs.
- Re-sharpen often. A blunt pencil adds a visible width to every mark.
A pencil line has real thickness, so for close-fit joinery, many woodworkers switch to a knife line. The line is narrower and gives a chisel or saw something to register against.
When a pencil is not the right tool
Marking knives and scribers
For fine joinery, a marking knife makes a thin, precise cut line that is more accurate than graphite. It does require a steady hand and a sharp blade, and it leaves a physical groove, so use it only where the line will be hidden or planed away.
Markers and crayons
Lumber crayons and paint markers are good for sorting, labeling and writing on wet or dirty surfaces. They are not precise enough for cut lines, but they excel for stud layout labels and material tracking.
Chalk lines
For long straight lines on roofs, subfloors and sheet goods, a chalk line gives a quick visible line over long distances. Choose a pencil only for short marks. Check chalk color options, because some colors can stain surfaces permanently.
Comparison table
This is a general comparison of marking tools, not a ranking of products.
| Tool | Best for | Strengths | Watch-outs |
|---|---|---|---|
| Flat wooden pencil, soft | Rough framing, sheathing, damp lumber | Bold mark, cheap, easy to replace | Wears fast, smears |
| Flat wooden pencil, medium | General carpentry and trim | Balanced darkness and wear | May need frequent sharpening |
| Flat wooden pencil, hard | Finish work, smooth stock | Crisp, fine line | Faint on rough surfaces |
| Mechanical carpenter pencil | Layout without sharpening | Refillable, tidy pocket carry | Refills are brand-specific |
| Clutch lead holder | Plans and detailed layout | Long point, refillable | Needs a pointer, thicker cores can be fragile |
| Marking knife | Joinery and cabinetmaking | Narrowest, most precise line | Needs sharp blade and care |
| Lumber crayon or marker | Labeling, wet or dirty surfaces | Highly visible | Imprecise and may stain |
Carrying and storing pencils
Most pencils get lost, not worn out. Keep a spare behind your ear and a couple in your pouch or a dedicated slot in your work pants. A small pencil pouch or sleeve keeps points from poking through pockets. Check that any pencil with an exposed point is not sitting upright in a pocket you lean against, because a sharp point can injure you in a fall or a bump. Do not keep a sharpened pencil behind the ear while climbing a ladder where a fall might drive the point into your head or face. A sharpener with a blade guard or a small knife sheath is better than loose blades in a pocket.
Buyer checklist
- Is the pencil flat or rectangular so it will not roll?
- Does the listing describe the lead as soft, medium or hard?
- Does the core suit my materials: rough lumber, treated wood or smooth stock?
- Do I want a classic pencil, a mechanical holder or a clutch style?
- If mechanical, are refills easy to find and clearly specified?
- Do I own a tool to sharpen it, such as a knife, a sharpener or sandpaper?
- Is the pack size practical, and will I lose them quickly?
- Does the grip suit gloves and sweaty hands?
- Does the manufacturer describe any specialty marking, such as wet-surface or colored cores?
- Do I need a pocket clip, a tether or a pouch?
To round out the kit, you can add a carpenter pencil sharpener or a marking knife for fine joinery.
Mistakes to avoid
- Using one lead for everything. A soft pencil is wrong for fine work and a hard one is hard to read on rough lumber.
- Letting the pencil go dull. A thick line equals a loose cut.
- Marking in the wrong place. Always mark the waste side, or decide on which side the blade sits.
- Pressing too hard. It wastes graphite, dents soft wood and breaks leads.
- Using colored or waxy marks on finish surfaces. They may not sand out.
- Sharpening toward your hand. Cut away from your body, with a controlled stroke.
- Ignoring refill compatibility. A fancy holder is useless if you cannot find leads.
- Carrying a sharpened pencil carelessly. Point-up in a pocket or behind the ear is a hazard in a fall.
FAQ
1. Why are carpenter pencils flat?
A flat body stops the pencil rolling off slopes and benches, it is easy to grip with gloves, and it lets you sharpen a chisel edge that draws both thin and thick lines.
2. What lead hardness is best for general carpentry?
A medium lead is the usual all-rounder. Go softer for rough, damp or dark wood, and harder for smooth stock and fine layout.
3. How do I sharpen a flat carpenter pencil?
Use a sharp knife, sandpaper, a rasp or a sharpener made for flat pencils. Shape a chisel edge, cut away from your body and keep your fingers clear of the blade.
4. Are mechanical carpenter pencils worth it?
For many people yes, because they never need sharpening and they carry tidily. Check that the refills are easy to buy and that the body is sturdy enough for your work.
5. Can I use a regular pencil for carpentry?
You can for light tasks, but a round school-style pencil rolls, snaps against rough wood and gives you only one line width. A flat pencil is better suited to the work.
6. Will pencil marks show through paint or stain?
Graphite is generally easier to sand away than waxy or pigment marks, but heavy lines pressed into the grain can still show. Mark lightly on visible faces and test on scrap if you are unsure.
7. When should I use a marking knife instead?
Use one for precise joinery where a pencil line would be too wide, such as dovetails and fitted cabinet parts. Follow the manufacturer’s instructions and take care with the blade.
8. How can I stop losing my pencils?
Buy them in multi-packs, give each pouch or pocket a dedicated slot, choose a bright color if available and pick them up at the end of the day. A tether or clip helps when working at height.
Bottom line
The best carpenter pencil is the one that stays where you put it, shows up on your material and keeps a useful point. Start with flat, medium-lead pencils, add a soft one for rough lumber and a hard one for finish work, and choose a mechanical or clutch style if you want to skip sharpening. Pair it with a sensible sharpening method and a good marking routine, because the cleanest line comes from technique as much as the pencil. Check current specifications and instructions before you buy. When you are ready to stock up, browse carpenter pencil sets.
Disclosure: As an Amazon Associate, we earn from qualifying purchases. Links marked as sponsored may earn us a commission at no extra cost to you.